ONESOURCE
Workpapers Help
Add Attachment
When you add an attachment to Workpapers, first add the attachment to the system, then assign the attachment to a specific workpaper or set of workpapers. Only select a file that has not been added previously, either as an attachment or as a workpaper.
Valid file types are .xls, .xlsx, .pdf, .doc, .docx, .rtf, .csv, and .txt.
To add an attachment:
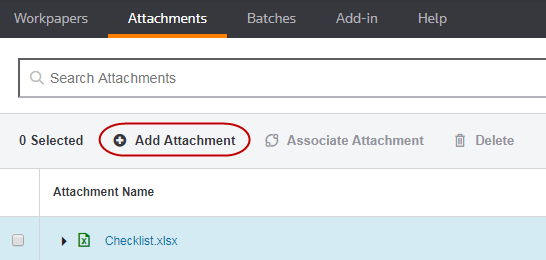
- In the Attachments grid, select Add Attachment.
You can also select Add Attachment from the Workpapers grid.
- In 1 Select file(s) for attachments, locate the file to attach, either by dragging it to the middle of the page or by selecting BROWSE FOR FILE.

If necessary, select
 to remove the file and choose a different attachment.
 - Select Next.
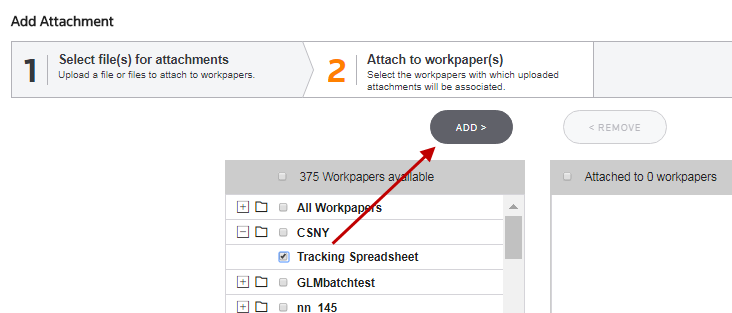
- In 2 Attach to workpaper(s), select the workpapers in the left pane to connect with the attachment. The list that appears includes workpaper folders.
- Select the plus sign to expand the folder and view specific workpapers. You can select multiple workpapers from multiple folders.
- You cannot select a workpaper that is checked out or locked.
- Select ADD to move the workpaper to the right pane.
- Select Save.
-
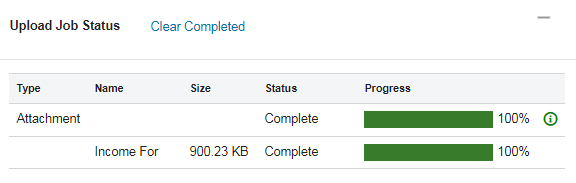
Review the upload details in the Upload Job Status pop-up. Successful jobs display a green progress bar, and failed jobs display a red progress bar.
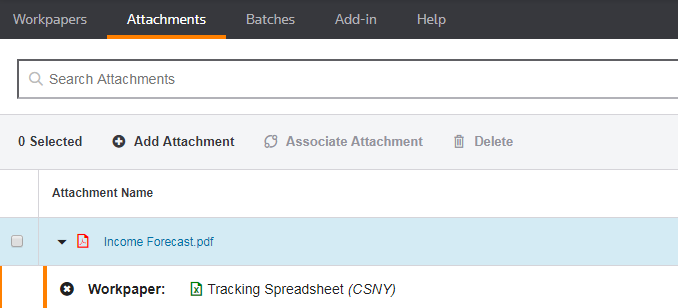
- In the Attachments grid, expand the attachment you added to see the associated workpaper.